How to Use the Vauz Autofill Browser Extension
Overview
After successfully registering your Vauz browser extension, you can start using it to automatically fill login credentials and other form data on websites. The extension provides two autofill modes to suit different preferences and security needs
Before using the extension: Make sure you've completed the extension registration process first
Autofill Modes
Logo Mode (Recommended)
Logo Mode is the default and most secure way to use the Vauz extension. It shows a Vauz logo icon in compatible form fields.
Step 1: Navigate to a Login Page
Go to any website that requires login credentials stored in your Vauz vault
Step 2: Look for the Vauz Logo
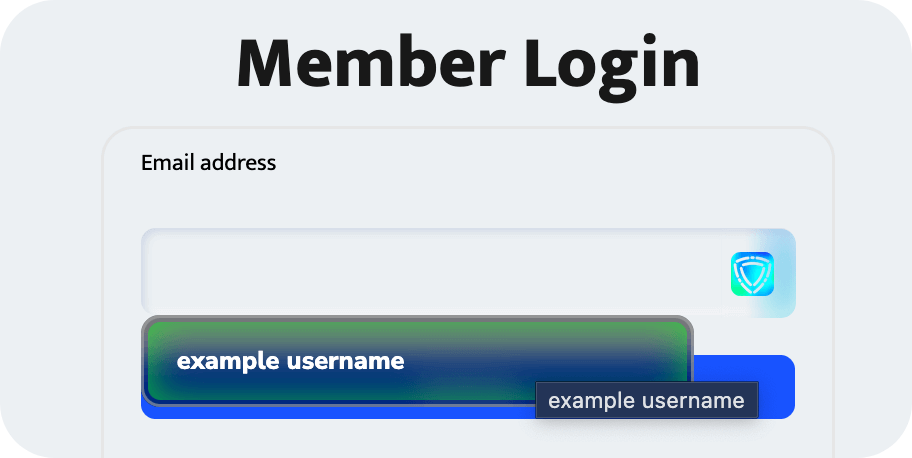
The Vauz logo will appear in username and password input fields on the page

Step 3: Choose Your Action
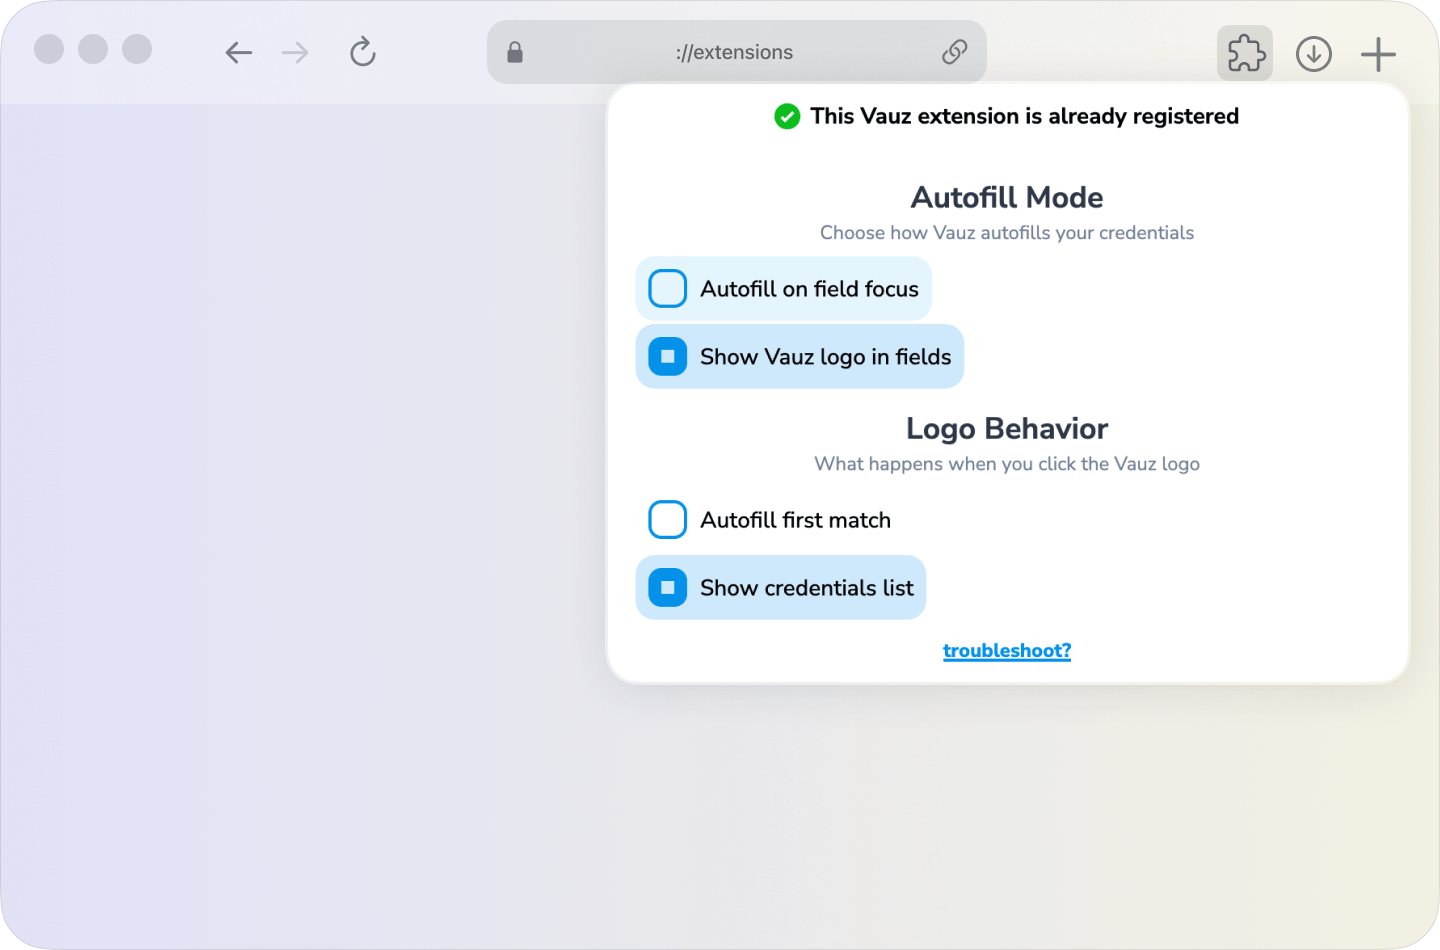
In the Vauz Autofill settings you can choose to either:
- Autofill first match: Automatically fills the first matching credential from your vault
- Show credentials list: Displays a dropdown with all matching credentials for that website
Step 4: Select and Fill
If you chose to show the credentials list, select the appropriate credential from the dropdown. The extension will fill both username and password fields automatically, if found
Auto Mode (Advanced)
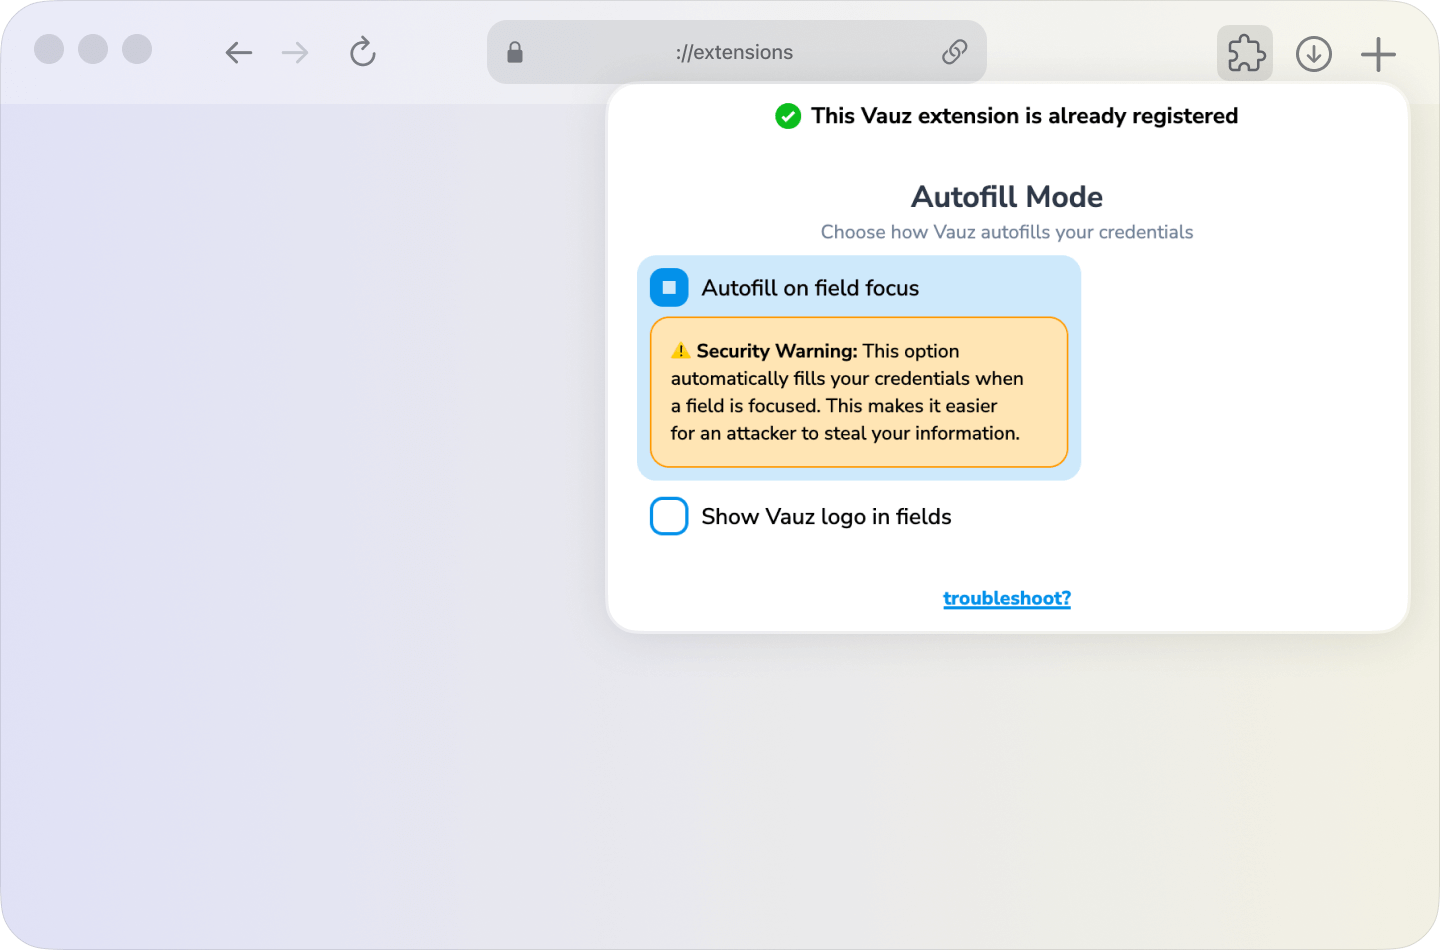
Auto Mode automatically fills first matching credential when you focus on form fields. This is more convenient but less secure
Security Warning: Auto Mode may expose your credentials on compromised websites. Use this mode at your own risk
Step 1: Enable Auto Mode
- Click the Vauz extension icon in your browser toolbar
- Switch to
Autofill on field focusin Autofill Mode section
Step 2: Navigate to Login Fields
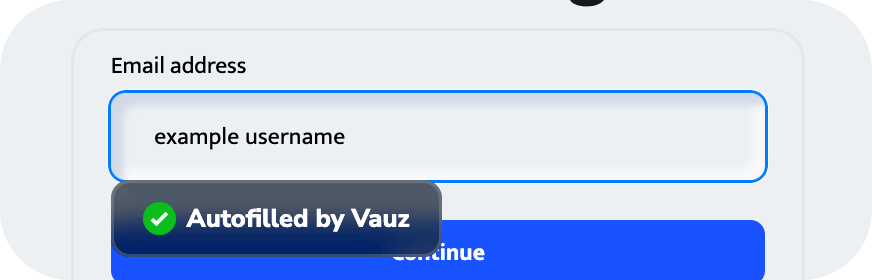
Go to a website with login forms. The extension will automatically detect and fill compatible fields when you click on them
Step 3: Review Filled Data
Always verify that the correct credentials have been filled before submitting the form
Managing Your Credentials
Adding New Credentials
When the extension detects a login form but doesn't find matching credentials:
Updating Existing Credentials
If you've changed a password on a website:
Multiple Accounts per Site
Vauz Autofill and main app support multiple credentials for a single domain. If you have multiple accounts for the same website:
- Ensure
Show credentials listmode is selected in the Logo Behavior section of Vauz Autofill settings - Click the Vauz logo in a field to open the credentials dropdown
- Select the specific credential you would like to use for login
Troubleshooting Usage Issues
For connection issues, see general troubleshooting guide
Wrong credentials are suggested or Extension fills data on wrong websites
Check that the domain matches exactly
Review your stored credentials in the main Vauz application
Delete any incorrectly matched credentials
Best Practices for Security
- Use Logo Mode: Stick to
Show Vauz logo in fieldsandShow credentials listfor maximum security - Verify Before Submitting: Always check domain validity and filled credentials before logging in
- Regular Updates: Keep both the extension and main application updated
Authentication Settings
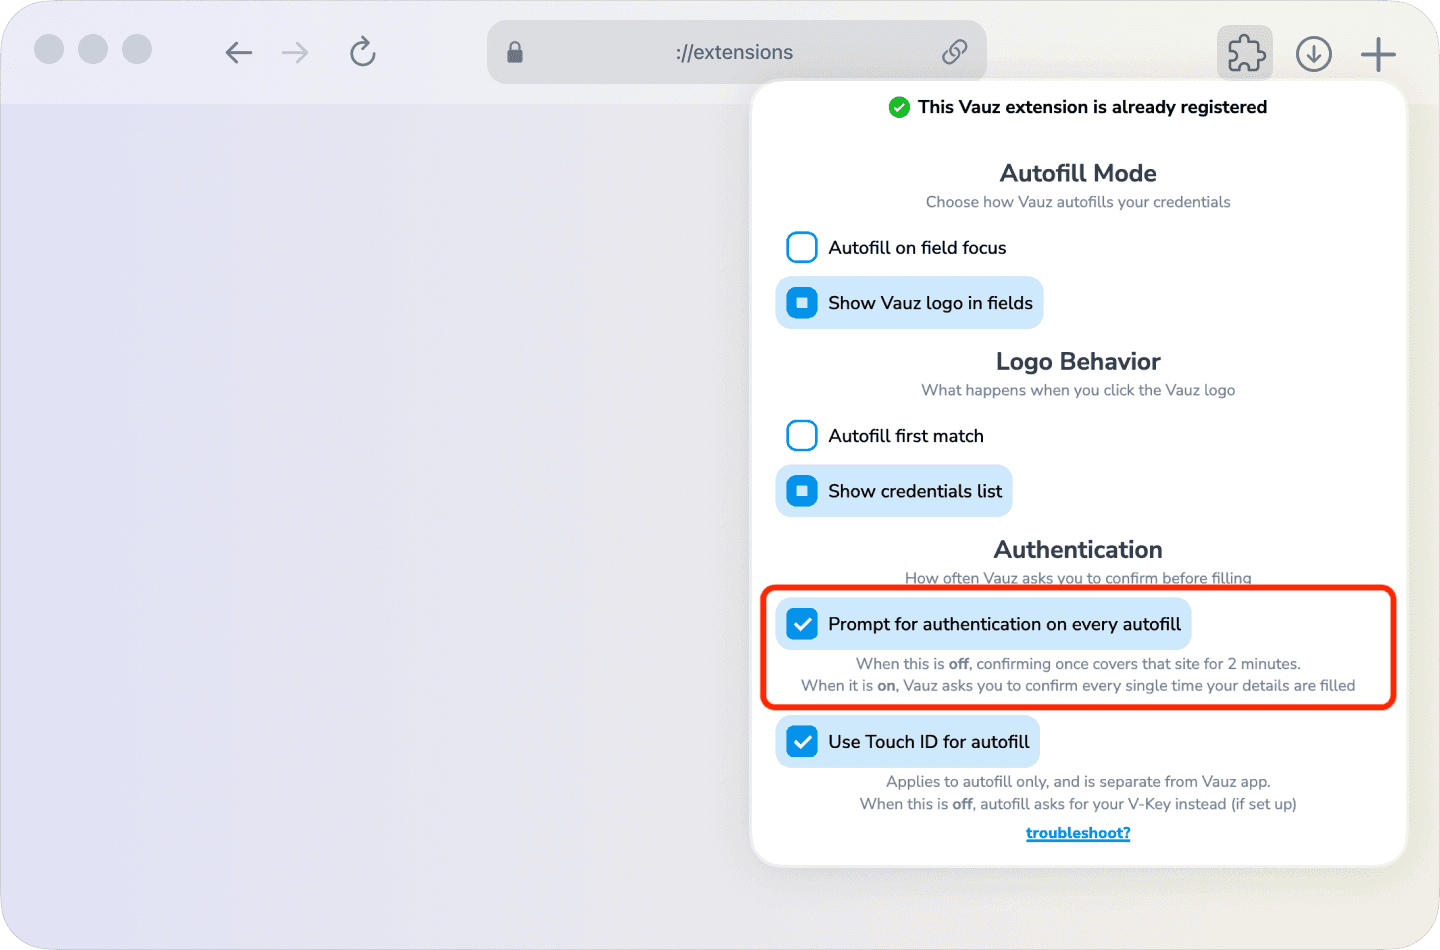
Prompt for authentication on every autofill
Every time the extension asks for a saved login, the Vauz app asks you to approve it — with Touch ID, or your V-Key. See Understanding the "Release saved logins?" Prompt
By default, approving once covers that website for two minutes, so filling several fields on one sign-in page does not ask you repeatedly
This setting removes that grace period
Open the Vauz Autofill extension settings
Find the Authentication section
Turn on Prompt for authentication on every autofill
| Setting | What happens |
|---|---|
| Off (default) | Approving once covers that site for two minutes. Further autofills on it are filled without asking again |
| On | Vauz asks you to confirm every single time your details are filled |
This setting can only make Vauz ask more often, never less. Turning it off does not remove the approval prompt itself — it only restores the two-minute grace period
Turn it on if you share a computer. Leave it off if you find repeated prompts on multi-step sign-in forms disruptive
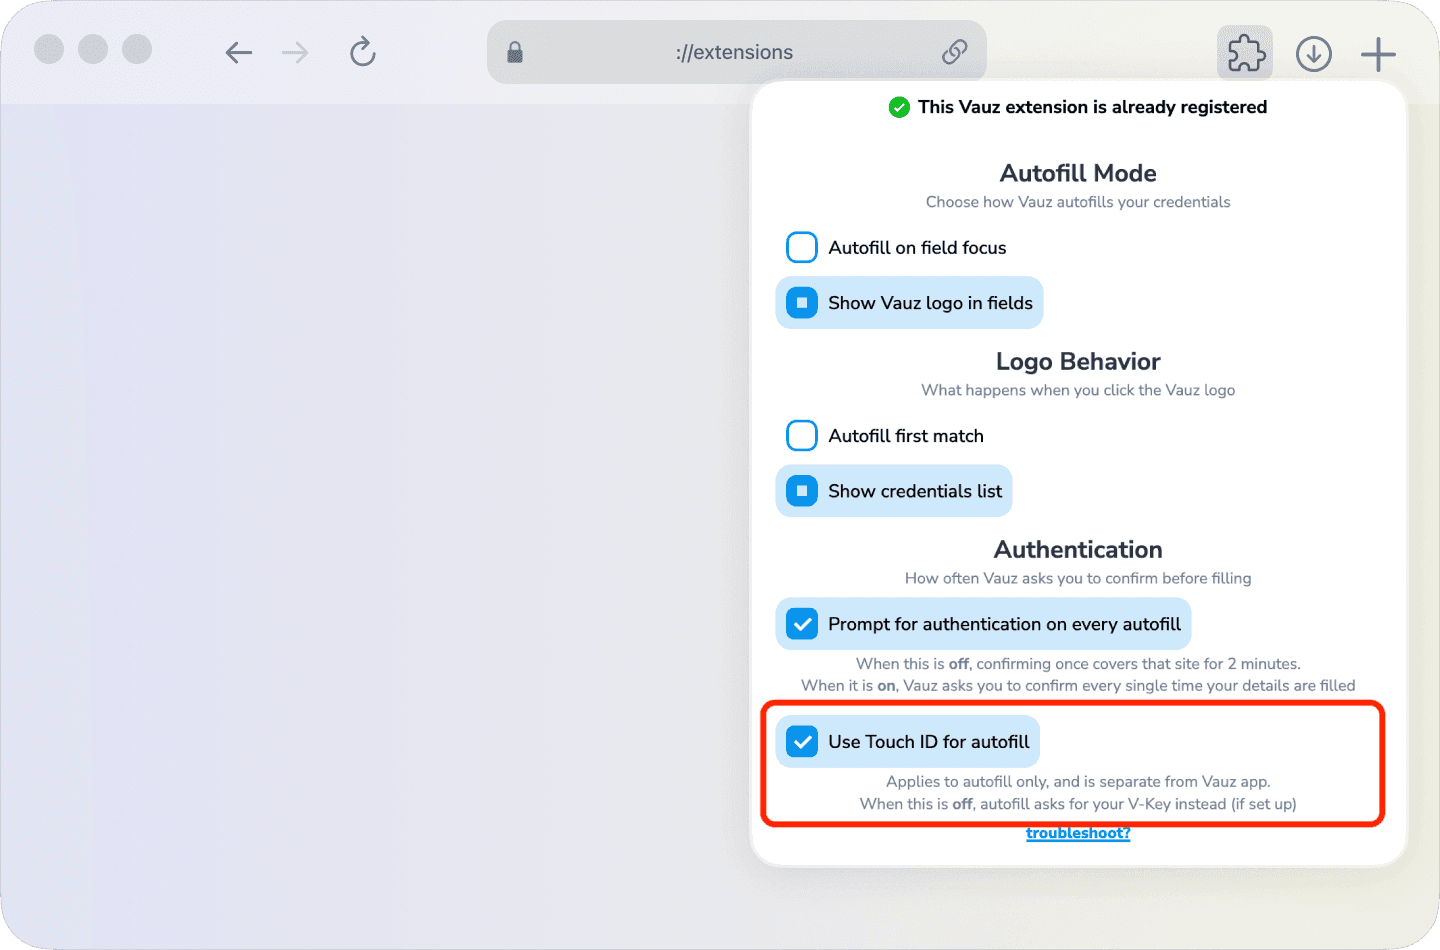
Use Touch ID for autofill
macOS only. Decides whether autofill may approve a release with your fingerprint
This is not the same as Unlock with TouchID in the Vauz app. That setting decides how you open your vault. This one decides how you approve a saved login leaving it for your browser — a different question, and plenty of people want different answers to the two
Open the Vauz Autofill extension settings
Find the Authentication section
Turn Use Touch ID for autofill on or off
| Setting | What happens when autofill needs approval |
|---|---|
| On (default) | Touch ID, if a fingerprint is enrolled on this Mac |
| Off | The Vauz V-Key window instead |
Turning it off never means being asked for less. The V-Key window is the stricter check of the two — it asks for something you know, rather than something the machine can read from your finger
Touch ID is only ever offered when a fingerprint is genuinely enrolled in System Settings → Touch ID & Password. A Mac with the sensor but nothing set up asks for your V-Key regardless of this setting, as do Windows and Linux
Advanced Features
Form Filling Beyond Passwords
In the future, we are planning to let the extension fill:
- Credit card information
- Address details
- Personal information
Keyboard Shortcuts
Currently, there is no functionality for shortcuts support, but we may consider adding it in the future. Let us know if you think this feature is important
Frequently Asked Questions
Q: Can I use the extension on mobile browsers?
A: No, the Vauz extension only works with desktop browsers that support native messaging
Q: Does the extension work with all websites?
A: The extension works with most standard websites. Some sites with custom login forms or heavy JavaScript may have limited functionality
Q: How do I disable the extension temporarily?
A: Click the extension icon and look for a pause or disable option in the menu
Q: Can I export my data from the extension?
A: No, all data is stored securely in your main Vauz vault. Export through the desktop application
Need More Help?
If you're having trouble using the extension:
Contact Vauz support with details about your issue and browser information